
Building a dynamic open graph maker
An important feature for the new Motionbox is to have beautiful looking og:image (open graph image). If you want to learn more about open graph images here is a link ogp.me.
Open graph images are important when sharing links on social media sites. They give your link context and act as a good marketing tool because of their visual nature. You can add graphics so good that your viewers have no choice but to click on them.
Today I am going to show you how to code an open graph image maker tool that will take some dynamic data and render an image on the fly using Node.js and serverless functions.
Tools we will be using
Before we get started here is a high level overview of all the tools we will be using. All of the code from this tutorial can be found on GitHub.
- Node.js 16+
- Google Cloud Functions
- Puppeteer
- Vercel
Getting started
I whipped up a fresh Github repo here github.com/bluematter/ogmaker you can reference or use at anytime. This guide will instruct you step by step how I am building this repo and deploying it to GCP. Let's get to coding!
First create a new folder on your local computer, and via the CLI we want to cd into the folder and clone the repo.
cd ~/Documents/YOUR_PROJECT
git clone https://github.com/bluematter/ogmaker.git .
I am a fan of TypeScript so we're going to add a tsconfig.json file and a package.json file to get the initial project setup initiated.
We're going to initiate a tsconfig.json file using the following command
npx tsc --init
To setup your package.json while in the root directory type this command
yarn init
Or if you prefer npm
npm init
Feel free to change the contents of the package.json I personally hit enter on every option leaving it to the defaults.
Now lets install our core deps:
yarn add -D typescript
yarn add @google-cloud/functions-framework
We need to use puppeteer v18.0.0, I wasn't able to get v19+ to work on GCP, I would test for yourself, maybe there will be a patch after this writing. As of this writing v18.0.0 works well.
yarn add puppeteer@18.0.0
Creating our function
Let's create an src folder and a file called index.ts inside of the folder using this command.
mkdir ./src && cd ./src && touch index.ts
Now open the ./src/index.ts file inside your editor and let's write some ts code!
import { HttpFunction } from '@google-cloud/functions-framework';

export const ogmaker: HttpFunction = async (req, res) => {
  console.log('It Works');

  res.status(200).send({
    works: true,
  });
};
Making sure everything is setup
Before we continue development, I want to make sure everything is wired up correctly. Making sure the foundation in place before the code gets more complex is important.
So lets add some scripts to our package.json file so we can run some tests on our code locally. Add the following into your package.json
"scripts": {
  "start": "npx tsc && npx functions-framework --target=ogmaker --allow-unauthenticated"
},
Also add this somewhere above in your package.json
"main": "dist/index.js",
We also need to update our tsconfig.json file to set the correct output paths for our compiled js code, we are taking our TypeScript code and using the tscompiler to generate plain JavaScript code. So add the following somewhere inside your tsconfig.json.
"outDir": "./dist"
Boom! If everything is setup correct you can run the following in the CLI from the root directory and have a sever serving the function we created above.
yarn start
You should see an output similar to this, and it should be available on port :8080.
michaelaubry@MacBook-Pro-2 ogmaker % yarn start
yarn run v1.22.19
$ npx tsc && npx functions-framework --target=ogmaker --allow-unauthenticated
Serving function...
Function: ogmaker
Signature type: http
URL: http://localhost:8080/
Lastly to test you get a JSON response, you should invoke http://localhost:8080/ in your browser, or use curl, or use Postman. The response you should see looks like this
{ "works": true }
All looks good, we are set, lets get down to business 🎉
Adding Puppeteer
We're going to import the puppeteer package, and set up puppeteer. One thing that is going to be important for us to develop this tool the way we want is to have custom HTML generated on the fly that we can take a screenshot of.
This is why you will see the import generateHTML from './html' line and I will explain more about this below.
import { HttpFunction } from '@google-cloud/functions-framework';
import puppeteer from 'puppeteer';
import generateHTML from './html';

export const ogmaker: HttpFunction = async (req, res) => {
  try {
    const browser = await puppeteer.launch({
      headless: false, // for testing lets make the browser window appear
    });
    const page = await browser.newPage();

    await page.setContent(generateHTML({}));
    await page.waitForSelector('.ready');

    res.status(200).send({
      works: true,
    });
  } catch (e: any) {
    console.log({
      e,
    });
  }
};
Create a new file in the src directory called html.ts and add this boilerplate code. This code acts as our canvas for our open graph image. Right now it's a blank canvas, and the only goal right now is to have a canvas.
Next we will talk about designing the canvas and inserting dynamic variables.
interface IHTML {}

export default ({}: IHTML) => {
  return `
    <html>
      <head>
        <meta charset="UTF-8" />
        <script>
        </script>
        <style>
          * {
            box-sizing: border-box;
            margin: 0;
            padding: 0;
          }
          #root {
            width: 100%;
            height: 100%;
          }
        </style>
      </head>
      <body>
        <div id="root"></div>
        <script>
          const onReady = async () => {
            // Ready begin rendering
            const div = document.createElement('div')
            div.className = 'ready'
            document.body.appendChild(div)
          };
          document.addEventListener("DOMContentLoaded", onReady);
        </script>
      </body>
    </html>
  `;
};
Before we move on, make sure everything is working correctly. Run the following command in the root directory.
yarn start
The app should be served up on port :8080, so if you invoke the url, it should be triggered and puppeteer should open in non headless mode and you should see a browser instance with our HTML loaded up.
Lets build our canvas
First thing I want to setup is our canvas size. After a quick Google search I can see the common open graph image size is 1200 x 630 pixels.
interface IHTML {}

export default ({}: IHTML) => {
  return `
    <html>
      <head>
        <meta charset="UTF-8" />
        <script>
        </script>
        <style>
          * {
            box-sizing: border-box;
            margin: 0;
            padding: 0;
          }

          body {
            width: 1200px;
            height: 630px;
          }

          #root {
            width: 100%;
            height: 100%;
          }
        </style>
      </head>
      <body>
        <div id="root"></div>
        <script>
          const onReady = async () => {
            // Ready begin rendering
            const div = document.createElement('div')
            div.className = 'ready'
            document.body.appendChild(div)
          };
          document.addEventListener("DOMContentLoaded", onReady);
        </script>
      </body>
    </html>
  `;
};
The key is adding the CSS inside the document, adding width and height to the body selector is where the magic is.
body {
  width: 1200px;
  height: 630px;
}
Now with the power of some basic HTML and CSS we can design our open graph image, lets do this first, then move onto talking about how to dynamically insert content, like images and text.
Design
For this tutorial I am going to keep it simple. The main criteria I have are the following
- Has some base color/image as a default
- Big bold marketing text in the center of the image
- A nice border around the image
- Possibly a component that holds meta data like avatar, username, date, etc
Lets add a few basic styles, nothing too fancy for this demo, I will let you style it however you want.
body {
  width: 1200px;
  height: 630px;
  overflow: hidden;
  background: #2362bd;
}

#root {
  width: 100%;
  height: 100%;
  display: flex;
  align-items: center;
  justify-content: center;
  color: #fff;
  font-family: sans-serif;
  text-transform: uppercase;
  border: 10px solid;
}
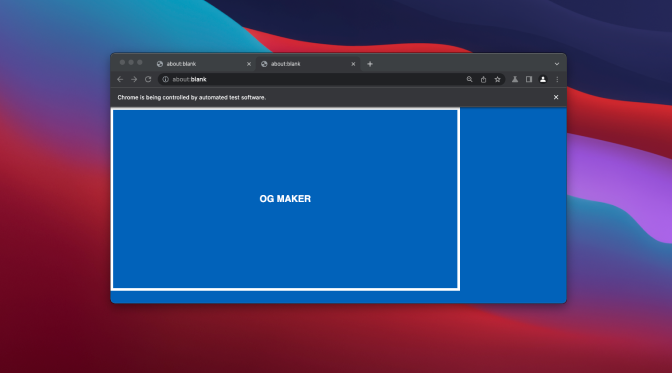
Then I added an H1 element inside the #root node. Something like this.
<div id="root">
  <h1>OG MAKER</h1>
</div>
When booting up puppeteer locally in headfull mode, you should see something like this. Not the most pretty open graph image in the world, but it's a great foundation.
Adding dynamic text
For this tutorial I am going to skip out on adding dynamic images and colors. We could turn this into a service and offer templates, and lots of custom options. I will show you the basics of inserting dynamic variables and that should be enough to get you going if you wanted to add more options.
Most software is I/O (input and output) so the important thing to keep in mind here when adding dynamic properties is to think about where the input will be coming from.
Since we are invoking this function over HTTP, we have the ability to pass in data to our req request handler. This is the perfect place to add an input variable to our API.
Inside of /src/index.ts within our function we want to add a req.body property called title that we can use to pass into our HTML document.
const { title }: any = req.body;
The full function looks like this
import { HttpFunction } from '@google-cloud/functions-framework';
import puppeteer from 'puppeteer';
import generateHTML from './html';

export const ogmaker: HttpFunction = async (req, res) => {
  try {
    // we are reading title inside the request body here
    const { title }: any = req.body;

    const browser = await puppeteer.launch({
      headless: false,
    });
    const page = await browser.newPage();

    // we are passing the title into our function here
    await page.setContent(
      generateHTML({
        title,
      })
    );
    await page.waitForSelector('.ready');

    res.status(200).send({
      works: true,
    });
  } catch (e: any) {
    console.log({
      e,
    });
  }
};
Then going back to our HTML code, you can see we add title to our interface and make it an optional prop. The reason for that is because there is no guarantee that the function will be invoked with title in the request body.
We could throw an error if title is not supplied, but in this case I'd rather let the code run and use a back up title in case one is not supplied.
interface IHTML {
  title?: string;
}

export default ({ title }: IHTML) => {
  return `
    <html>
      <head>
        <meta charset="UTF-8" />
        <script>
        </script>
        <style>
          * {
            box-sizing: border-box;
            margin: 0;
            padding: 0;
          }

          body {
            width: 1200px;
            height: 630px;
            overflow: hidden;
            background: #2362bd;
          }

          #root {
            width: 100%;
            height: 100%;
            display: flex;
            align-items: center;
            justify-content: center;
            color: #fff;
            font-family: sans-serif;
            text-transform: uppercase;
            border: 10px solid;
          }
        </style>
      </head>
      <body>
        <div id="root">
          <h1>${title ? title : 'No title provided'}</h1>
        </div>
        <script>
          const onReady = async () => {
            // Ready begin rendering
            const div = document.createElement('div')
            div.className = 'ready'
            document.body.appendChild(div)
          };
          document.addEventListener("DOMContentLoaded", onReady);
        </script>
      </body>
    </html>
  `;
};
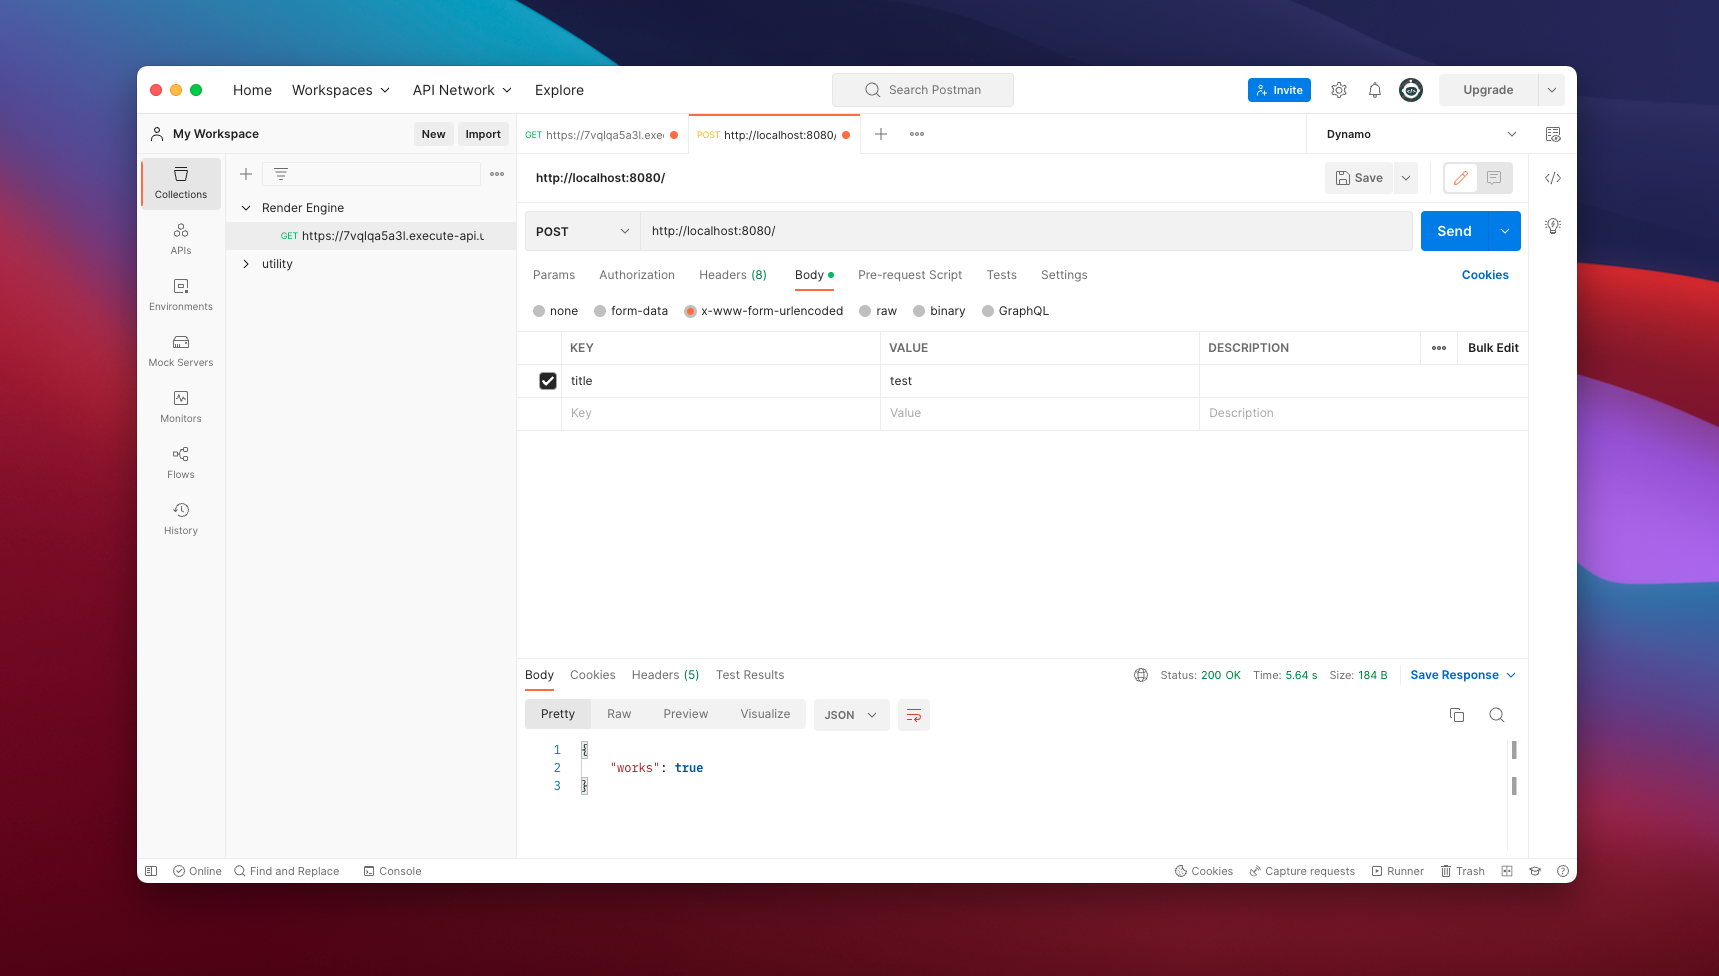
If you use Postman and send a POST request using x-www-form-urlencoded and insert title as a key and whatever dynamic string you want to appear in your open graph image as the value, then press send, you should see puppeteer boot up with your dynamic request.
Taking the screenshot
The final thing I want to do in this tutorial to wrap up our feature is get the binary data of the pixels, i.e a screen shot of the element as a .jpg file or .png file.
With Puppeteer this is fairly easy, so let's crack right into it, we are almost done with v1.
import { HttpFunction } from '@google-cloud/functions-framework';
import puppeteer from 'puppeteer';
import generateHTML from './html';

export const ogmaker: HttpFunction = async (req, res) => {
  try {
    const { title }: any = req.body;

    const browser = await puppeteer.launch({
      headless: false,
    });
    const page = await browser.newPage();

    await page.setContent(
      generateHTML({
        title,
      })
    );
    await page.waitForSelector('.ready');

    // screenshot
    const pageFrame = page.mainFrame();
    const rootHandle = await pageFrame.$('#root');

    if (rootHandle) {
      const screenshot: string | void | Buffer = await rootHandle.screenshot({
        encoding: 'base64',
        omitBackground: true,
        type: 'jpeg',
        quality: 100,
        captureBeyondViewport: false,
      });

      if (typeof screenshot === 'string') {
        // we can take this buffer and upload it to GCP if we would like to
        const screenshotBuffer = await Buffer.from(screenshot, 'base64');
      } else {
        throw new Error('Screenshot is not a string');
      }
    } else {
      throw new Error('No root element found');
    }

    res.status(200).send({
      works: true,
    });
  } catch (e: any) {
    res.status(500).send({
      error: e.message,
    });
  }
};
Now we have a Buffer that we can use to send to a Google Bucket or AWS S3 Bucket. Right here in this line const screenshotBuffer = await Buffer.from(screenshot, 'base64') is where the magic is.
Uploading to the Cloud
For this tutorial and codebase I will be using Google Cloud Buckets. I just setup a bucket on my account, go ahead and do the same. If you need help with that feel free to reach out to me, or preferably spend a few minutes Googling how to do that.
We are going to use the @google-cloud/storage Node.js SDK. So let's install it.
yarn add @google-cloud/storage
Now that we have the package, lets start writing the code to take our buffer data and have it send it to our bucket.
To keep our code modular and easier to read/work with, I am going to create a file called upload.ts within the src folder. The code will look like this.
import { Storage } from '@google-cloud/storage';

interface IUpload {
  buffer: Buffer;
}

const storage = new Storage();

export default async ({ buffer }: IUpload) => {
  const bucket = storage.bucket('YOUR_BUCKET_NAME_HERE');
  const file = bucket.file('test.jpg');

  // Uploads the file.
  return await file.save(buffer);
};
There is one minor improvement we can make. Right now we are hardcoding the file name to test.jpg, this is no good if we want to scale this function. We have two options, and can choose either option or choose to combine both options into one.
The first option is to pass in a file name or ID via the client and use that as our ID. This gives us more control, and we can use slugs etc as our ID.
The other option is to generate a unique ID using UUID.
We can also combine both options and look for an ID param in the req.body and if it exists we will use it. If it does not exist, we can default to UUID. I actually like this option better, it's more resilient and configurable. Lets build it!
interface IUpload {
  buffer: Buffer;
  fileName?: string; // Lets add this to our interface & make it optional
}
Now on line 12 we can write a ternary
const file = bucket.file(fileName ? fileName : 'test.jpg');
Lets make sure to read this in our req.body within our index.ts file.
const { title, fileName }: any = req.body;
Then we must pass that argument into our upload function like this
await upload({
  buffer: screenshotBuffer,
  fileName,
});
Great, but we know this variable can be undefined and in that case we want to use a library called uuid to uniquely generate an ID for us. Lets install it!
yarn add uuid && yarn add -D @types/uuid
Then lets use it in the place of test.jpg like this
import { Storage } from '@google-cloud/storage';
import { v1 as uuid } from 'uuid';

interface IUpload {
  buffer: Buffer;
  fileName?: string;
}

const storage = new Storage();

export default async ({ buffer, fileName }: IUpload) => {
  const fName = fileName ? fileName : uuid() + '.jpg';
  const bucket = storage.bucket('motionbox-og-images');
  const file = bucket.file(fName);

  // lets return the file name if its uniquely generated so we can have reference on the client
  return {
    fName,
    uploaded: await file.save(buffer),
  };
};
Then in our index.ts file we can send back the file name to the client in the case it is uniquely generated, this is important to maintain reference to where the file is located, in the case you want to save it in a database or render it on the screen upon a response.
const uploadedFile = await upload({
  buffer: screenshotBuffer,
});

res.status(200).send({
  created: true,
  uploadedFile,
});
After sending your request you should get a response similar to this
{
  "created": true,
  "uploadedFile": {
    "fName": "eb54f610-a67d-11ed-a4e2-bda12d775f34.jpg"
  }
}
Deploying
The final thing that we need to setup in order to deploy our function properly to GCP is a tiny little script command that will compile our TypeScript code and deploy for us.
Open your package.json file and add this new script key value pair. We already have the start script, we are now adding deploy.
"scripts": {
  "start": "npx tsc && npx functions-framework --target=ogmaker --allow-unauthenticated",
  "deploy": "npx tsc && gcloud functions deploy ogmaker --gen2 --runtime=nodejs16 --region=us-central1 --source=. --entry-point=ogmaker --trigger-http --allow-unauthenticated --timeout=600 --memory=2GiB"
},
Before you can actually use the gcloud command you need to install it on your system and configure it. Here is a link to installation instructions for installing gcloud on your system cloud.google.com/sdk/docs/install
Lastly, feel free to adjust the parameters of the deploy command you can adjust --runtime to use a different version of node.js. You can change your --region, --timeout, and --memory settings.
Final thoughts
I hope this was insightful, and again all this code is hosted on GitHub under this repo github.com/bluematter/ogmaker. If you have any suggestions on making this better, or would like to fork and have your own copy, please feel free to do so.
If you enjoyed this and want more, sign up to the newsletter where I will keep you in the loop.
I'm going to turn this code into a micro SaaS product and write another follow up post around how I will turn it into a product and market it. Subscribe if you want me to email you when that post is ready! 👇 enter your email for the updates, no spam, unsubscribe at any time.